Understanding Goldfish Plant Propagation
To propagate your goldfish plant in water effectively, you need to understand goldfish plant propagation, the process of reproducing more plants from the original one. Goldfish plant propagation offers various benefits, and you can learn more about its definition and advantages in this section.
Definition of Goldfish Plant Propagation
Propagation of Goldfish Plants refers to the process by which one can cultivate and grow new plants from parent plants, rather than purchasing the already grown plants. This is an inexpensive, fun, and rewarding way to further build a green space.
- First, select a healthy parent plant that has mature growth in it.
- From the parent plant, cut stem tips with at least two nodes and remaining leaves.
- Plant the cutting into damp, well-draining soil mix and cover it with plastic or glass to protect humidity levels and prevent moisture loss until new growth appears.
Goldfish Plants prefer bright indirect light and warm temperatures between 60-75°F for propagation. Moreover, propagating during spring and summer seasons will yield maximum success rates.
Pro Tip: Avoid direct sunlight exposure on cuttings during rooting time as they may overheat or dry out.
By propagating your goldfish plants, you’ll have more fish than your neighbor without ever having to clean a tank.
Benefits of Propagating Goldfish Plants
Propagation of Goldfish Plants: A Source of Immeasurable Advantages
Goldfish plant propagation is a wonderful hobby for green thumbs and home gardeners. It is a simple process that produces new plants from mature ones and offers a range of benefits that cannot be overstated.
- Cost-effectiveness – Propagating Goldfish plants rather than buying new ones saves you money in the long run.
- Sustainability – Growing plants from cuttings is an eco-friendly way to protect the environment by reducing waste.
- Plant Growth Control – Propagation helps to control the size and shape of your greenery creating consistency in looks.
- Culinary Benefits – The edible leaves from goldfish plants are perfect for seasoning various dishes.
- Share with Friends – This method provides an opportunity to gift mature or baby plants to family and friends.
It’s essential to note that propagating goldfish plants does not require much effort or special equipment. By taking care of these low maintenance plants, you can watch them grow and thrive no matter your skill level.
Indulging in propagation also opens up avenues for exploration in soil, fertilizers, specific watering needs, lighting, and other growing methods that may differ from what you currently use.
I recently shared my freshly propagated goldfish plant with a friend who had never seen one before. She was thrilled with her gift as it brought warmth and color to her home while easily fitting into her décor scheme.
Preparing for propagation: because even plants need a little TLC before they can multiply like rabbits.
Preparation for Propagation
To prepare for propagating your goldfish plant in water, you need to choose the right time, stem, and gather necessary materials. Choosing the right time for propagation ensures the success of your plant. Choosing the right stem for propagation is crucial to stimulate new growth. Gathering necessary materials for propagation helps to create a conducive environment for successful propagation.
Choosing the Right Time for Propagation
Choosing the Best Time to Propagate Your Plants
Propagation is a vital process when it comes to plant propagation, and choosing the right time is crucial for its success. Here’s a 4-Step guide on how to select the perfect timing for your plant propagation:
- Research: First, research the type of plant you wish to propagate and identify its specific growing requirements.
- Seasonal Timing: Ideally, propagation should take place during the plant’s growing season, which varies from species to species.
- Weather Conditions: Pay attention to weather conditions such as temperature and humidity that affect growth before choosing a date for propagation.
- Stage of Growth: Choose the time when the parent plant is at optimum growth and health level.
It’s important also to note that timing varies based on vegetative horticultural methods, grafting or cutting since each method requires different levels of maturity in plants.
Mastering these essential details will lead to successful propagation in every attempt.
Finally, with risks like climate change taking over industries globally, it has never been a better time than now to start propagation. Don’t miss out on this practice; go ahead and try propagating some plants today!
Remember, it’s not just about finding the right stem for propagation, but also ensuring it’s not the one that got away from the authorities.
Choosing the Right Stem for Propagation
Propagation of new plants is an intricate process that calls for choosing the most suitable stem. Picking the appropriate plant with the right set of characteristics is crucial to ensure desirable results during propagation. Here’s how to choose the optimal stem for a successful propagation process.
| Characteristics | Description |
|---|---|
| Age | A young, healthy and mature stem has a higher chance of rooting than older stems. |
| Vigour | Choosing a vigorous stem ensures faster growth rates and stronger roots. |
| Bark | Easily peelable stems’ barks result in more successful propagation outcomes. |
| Length | The recommended length is roughly six inches in most cases for all kinds of plant stems. |
Proper selection of plant stems with at least three pairs of budding leaves attached, which are usually found on vegetative branches, aids in maximizing propagation success. With these tips, you’re all set to choose the perfect stem for your next plant project.
Stem cutting is one of the oldest ways people have propagated plants across centuries; ancient Egyptian images depicted people propagating plants through cuttings. It’s interesting to note that this practice dates back several millennia and has been significant even today in plant breeding and agriculture industries worldwide.
Get ready to stock up on supplies like a doomsday prepper, because propagation requires more than just a green thumb.
Gathering Necessary Materials for Propagation
When propagating plants, it is essential to collect all required materials before the process. This ensures a smooth and efficient propagation process.
- 1. gather plant cuttings from healthy specimens of the chosen species.
- Prepare sterilized pruning scissors or a knife to make clean cuts on the stems.
- Next, choose a rooting hormone powder for encouraging robust root growth.
- Prepare growing medium of choice such as peat moss or vermiculite that retains moisture but does not suffocate newly-formed roots.
- Lastly, select high-quality containers with adequate drainage holes for planting.
When preparing for propagation, be mindful of the environmental conditions of your workspace. Temperature control and lighting can affect prepping and handling methods.
Pro Tip: Optimal timing and care during collection result in higher success rates.
Let’s get to the root of the matter with these propagation methods, because who doesn’t love a good plant pun?
Propagation Methods
To propagate your goldfish plant easily, use the propagation methods section with the title “Propagation Methods.” In this section, we will cover two sub-sections- the water propagation method and the soil propagation method- as solutions to help you propagate your goldfish plant in a simple and straightforward manner.
Water Propagation Method
Through the Hydroponic Propagation Technique, plants can be grown using water as a base. Here is a 6-step guide for propagating plants in this method:
- Collect cuttings from a mature plant and remove any lower leaves.
- Fill a jar with lukewarm water and put the cutting inside carefully.
- Place the jar in an area with indirect sunlight and change the water every few days.
- The roots will start to grow after a few weeks, and once they are around two inches long, you can transfer the cutting to soil.
- Be sure to keep the soil moist and monitor its growth regularly.
- The newly grown plant should be kept away from direct sunlight in its early stages
Using this technique, some species of plants can be propagated quicker than others. For example, vines hardy enough to grow outdoors in USDA zones 4 through 9 often root more quickly than woody deciduous trees.
Did you know that according to the University of Missouri Extension Office, properly propagating water-plants require good quality water?
Give a stem a fish and it’ll feed for a day, submerge it in water and it’ll grow roots for a lifetime.
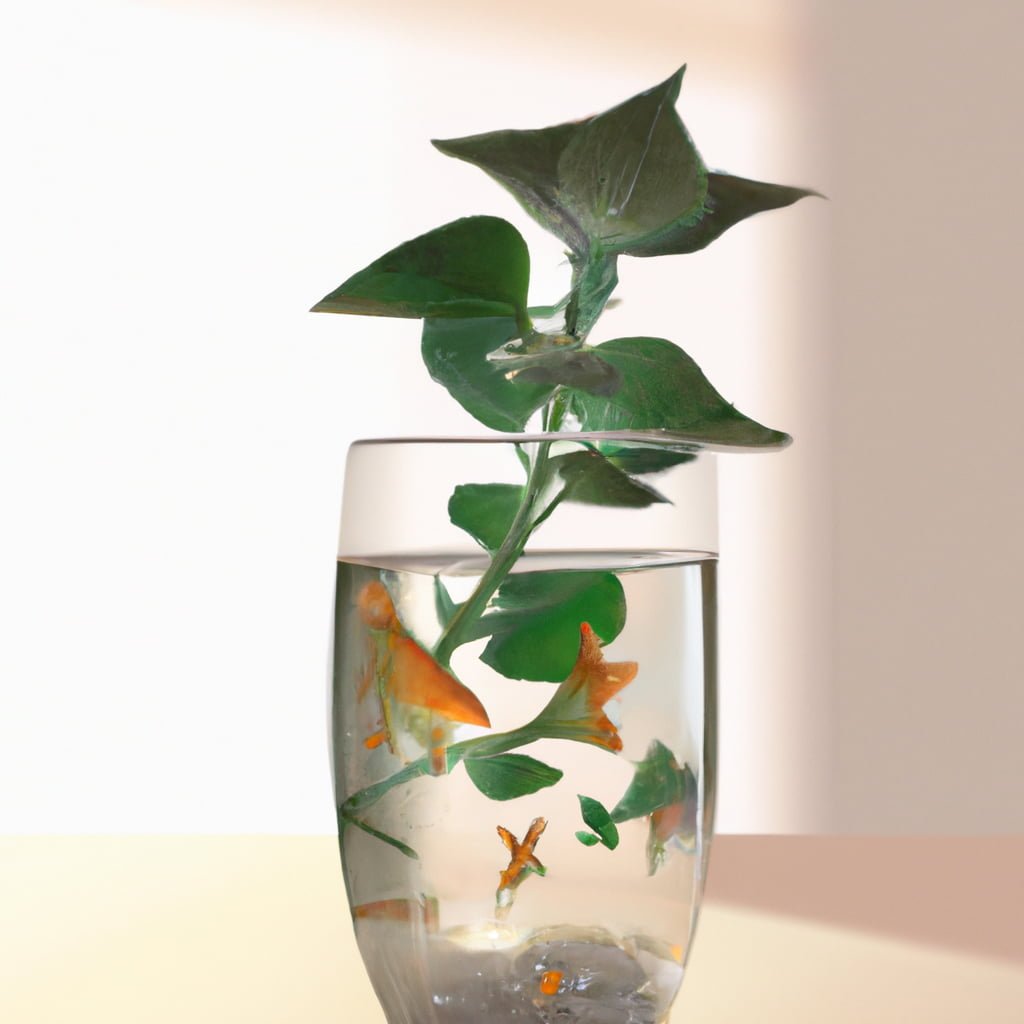
Submerging Stem in Water
To propagate plants through submerging the stem in water, a process called hydroponics, follow these steps:
- Cut a healthy stem from the mother plant, approximately 6 inches long.
- Remove any lower leaves and place the cutting in a container of distilled or filtered water. Ensure that at least two nodes are submerged under the water.
- Place the container in a bright but indirect light location and change the water every few days to prevent bacterial growth.
It’s worth noting that not all species of plants can be propagated through hydroponics methods. Furthermore, it’s essential to avoid overcrowding the cuttings as this can lead to rotting.
A friend who tried propagating succulents through hydroponic means found that only one out of four cuttings survived. This method may not work for all plant species or even individual plants depending on their overall health and environment. It’s always important to research and understand each specific plant’s needs before attempting any propagation technique.
Changing water regularly is like giving your plants a spa day, except your plants don’t complain about the temperature or music selection.
Changing Water Regularly
Regular Water Changes to Foster Optimal Propagation
Water is a crucial element in propagating new growth, but stagnant water can also breed harmful microorganisms. To ensure optimal plant growth as you propagate stem cuttings, maintaining a consistent supply of fresh water is essential.
Here’s our guide to changing your water regularly:
- Twice daily, fill the propagation container with fresh water.
- Tap or bottled water is suitable for propagation.
- If the container has no drainage holes, remove the cuttings and pour out any excess water.
- Rinse the container and refill it with clean water to just below the level of the cut ends of the stems without puncturing the surface tension of the water.
- Add liquid fertilizer at 1/4 strength once a week to promote root growth and plant health.
To avoid contamination and promote optimal plant development, rinse your container before each refill.
In addition to providing clean, oxygenated water in which to root stem cuttings, use a spray bottle every few days to mist your plants’ leaves to encourage transpiration and supplement moisture.
By ensuring that your propagation process is optimized, you can produce healthy plants that in turn yield successful harvests. Don’t miss out on higher-quality produce by skipping this simple yet crucial step!
Growing your plants in soil may be traditional, but who wants to be basic when you can be groundbreaking with soil propagation?
Soil Propagation Method
For those looking to propagate plants through soil, there are a variety of methods available. One way to do this is through the soil propagation method. Here’s how:
- Start with moist soil
- Insert cuttings into the soil
- Press soil firmly around cuttings
- Cover with a plastic bag and keep in bright, indirect light
- Keep the soil moist at all times
- Monitor the roots progress and transplant to new container after roots appear
It’s worth noting that this propagation method works best for plants that have soft stems and will readily root in soil.
Additionally, it’s important to use sterile equipment when propagating plants to avoid any potential diseases or pests. With proper care and attention, these methods can lead to successful plant propagation.
A well-known source for further reading on this topic is “The Complete Book of Plant Propagation” by Graham Clarke.
Get your hands dirty with soil preparations, because making babies isn’t a neat and tidy affair.
Preparing Soil for Propagation
To make the soil suitable for plant propagation, certain preparations must be made. These may include enriching it with essential nutrients, aerating it to allow healthy root growth, and ensuring optimal moisture levels. Here are the key steps to take:
- Choose a well-draining soil type that is suited to the particular plant variety you wish to propagate
- Remove any weeds or debris from the soil surface and ensure it is levelled out
- Add organic matter such as compost or leaf mould to boost nutrient content and improve texture
- Mix in controlled-release fertiliser or other slow-release nutrition sources to provide crops with effective supplementary nutrients throughout the growing season.
- Ensure the soil bed is well watered before planting
- Regular maintenance such as irrigation, mulching and pruning can help maintain good health of propagated plants
Avoid overcrowding within your soil care strategy. Each plant needs enough unobstructed space and resources (nutrients, water, sun) necessary for proper growth and development.
Pro Tip: Use a pH meter or test kit to track soil acidity levels regularly – this can help diagnose nutrient deficiencies and prevent damage from over-fertilisation.
Planting a stem in soil is like playing God, deciding which ones get to thrive or die a slow, withering death.
Planting the Stem in Soil
Planting the Stem in Soil: A Professional Guide
To propagate a plant, planting its stem in soil is an effective method. This process involves proper handling and planting techniques to ensure successful growth for the new plant.
Follow these 5 steps for planting the stem in soil:
- Choose a healthy stem with several leaves.
- Cut the stem at a 45-degree angle using clean, sharp scissors or shears.
- Dip the cut end into rooting hormone powder.
- Make a hole in moist soil with your finger or pencil and insert the stem about 2 inches deep.
- Mist the soil with water and cover with a plastic bag to retain moisture and humidity. Place it in indirect sunlight.
It is essential to keep monitoring the growth of your new plant by checking its moisture level regularly and ensuring adequate lighting.
Remember that each plant species has unique needs when it comes to propagation. It’s best to research specific techniques relevant to your chosen plants before starting.
You wouldn’t want to miss out on propagating beautiful plants that can brighten up any room. Get started now!
Remember, a plant is not just for Christmas, it’s for life (or until you forget to water it).
Caring for the New Plants
To care for your newly propagated goldfish plants from water, it’s important to consider proper lighting, water, and nutrients. In order to ensure success, providing the necessary conditions for healthy growth is key. This section, titled ‘Caring for the New Plants’, with sub-sections ‘Providing Proper Lighting for New Plants’, ‘Providing Sufficient Water and Nutrients for New Plants’, and ‘Avoiding Common Pitfalls in Goldfish Plant Propagation’ will help you explore and understand the best ways to care for your new plants.
Providing Proper Lighting for New Plants
New plants need proper lighting to thrive and grow.
Here’s a 4-step guide to providing the right amount of light for your new plants:
- Assess the plant’s needs based on its species and natural habitats
- Choose a spot that gets enough natural light, or use artificial lighting
- Make sure to adjust the amount of light as needed over time
- Observe the plant regularly for any signs of overexposure or inadequate lighting.
It is also important to note that different plants have varying lighting needs, so it’s essential to identify and cater to each species individually.
Ensure your new plants receive ample amounts of light with these easy steps. Don’t risk missing out on their beauty due to poor lighting conditions. Take action now!
Water and nutrients are to plants what coffee and donuts are to humans – essential for survival.
Providing Sufficient Water and Nutrients for New Plants
Providing the ideal amount of water and nutrients is crucial in fostering healthy growth of new plants. Here’s a practical guide to help you ensure that your plants are well-cared for.
- Watering:
- Water young plants regularly, but avoid overwatering as this could lead to root rot.
- Provide enough water to dampen the soil, but not to allow it to become waterlogged.
- Keep in mind that different types of plants require different amounts of water, so be sure to research their specific needs.
- Nutrients:
- Choose high quality soil that contains sufficient organic matter such as compost or manure.
- Add fertilizers according to label instructions, being careful not to overdose.
- Mulch around the base of the plant with organic materials such as leaves or straw to promote healthy soil conditions and nutrient retention.
It’s essential to monitor the condition of your plants daily, ensuring they are getting enough sunlight and protection from pests and diseases. Implement these guidelines consistently for best results.
A key factor in maintaining plant health is understanding their unique requirements for nutrition and hydration. Neglecting these factors can have detrimental effects on a plant’s development.
Did you know? A scientific study revealed that certain types of music can aid in plant growth. Classical music was found most effective in boosting photosynthesis, leading to healthier plants overall.
Why try to propagate goldfish plants when you could just buy more fish?
Avoiding Common Pitfalls in Goldfish Plant Propagation
Goldfish Plants are exquisite, vibrant houseplants that are relatively easy to propagate. It is essential to avoid common pitfalls that come with the propagation process to maintain healthy and flourishing plants. This article provides a guide on how to avoid these pitfalls in propagating Goldfish Plants.
4-Step Guide for Avoiding Common Pitfalls in Goldfish Plant Propagation:
- Soil Preparation: Use a well-draining soil mix for your cuttings when propagating. This prevents waterlogging and root rot.
- Appropriate Lighting: Goldfish Plants need bright, indirect sunlight for optimal growth. However, direct sunlight can damage the leaves and stunt plant growth.
- Watering Techniques: Over-watering or underwatering can cause root rot and other issues that negatively impact plant health. Water only when the top layer of soil is dry to the touch.
- Temperature Control: Goldfish Plants thrive between 60 to 75 degrees Fahrenheit temperatures; otherwise, they encounter developmental hurdles.
In addition to these steps, it is beneficial not to use foliage from unhealthy plants as this may introduce pests or diseases into your new plants.
To ensure healthy growth of propagated goldfish plants, care must be taken during the rooting phase by monitoring moisture levels regularly and ensuring proper light exposure, avoiding over-fertilizing young gold fish and propagating in multiple small containers rather than one large pot which could lead to poor drianage affecting rooting phase performance.
Growing plants is like raising children, except you can recycle their old pots and they won’t eventually ask for the car keys.
Conclusion
After following the steps to propagate a goldfish plant in water, you can expect healthy, new growth within a few weeks. Remember to change the water every few days and ensure that your plant is receiving plenty of bright indirect light. To make the process successful, use sterile tools, proper timing, and patience.
One often overlooked step is taking care not to overwater the plant during propagation. It’s important to strike a balance between providing enough moisture for rooting and avoiding root rot caused by excessive moisture. Additionally, if you notice any leaves turning yellow or brown, remove them as they will not recover.
Lastly, success in propagating goldfish plants often comes down to trial and error. Each plant is unique and may require slightly different methods to thrive. Don’t be discouraged if your first attempt doesn’t succeed – keep trying and learning from each experience.
A friend of mine once struggled with propagating her goldfish plant until she discovered that using distilled water yielded better results than tap water. Small changes like these can make all the difference when it comes to successful propagation!
Frequently Asked Questions
Q: Can goldfish plants propagate in water?
A: Yes, goldfish plants can be propagated in water.
Q: What is the best way to propagate goldfish plants in water?
A: The best way to propagate goldfish plants in water is by taking stem cuttings and placing them in a container with water.
Q: What kind of water should be used for propagating goldfish plants?
A: You can use any kind of water, but distilled or filtered water is best.
Q: How long does it take for goldfish plants to root in water?
A: It usually takes about 2-4 weeks for goldfish plants to grow roots in water.
Q: What should I do after the goldfish plants have rooted in water?
A: After the goldfish plants have rooted in water, you can transfer them into soil or continue to grow them in a water container.
Q: How often should I change the water for propagating goldfish plants?
A: You should change the water for propagating goldfish plants once a week to prevent bacteria or algae growth.

A passionate gardener and founder of ForTheLoveOfGardeners.com. She shares her expertise to help you cultivate thriving gardens and find joy in the beauty of nature.