Preparing for planting oxalis bulbs
To prepare for planting oxalis bulbs in pots with the right materials, start by selecting the right pot, preparing the soil, and choosing the right oxalis bulbs. We will guide you through each of these sub-sections, which will help ensure that your oxalis bulbs grow into beautiful plants.
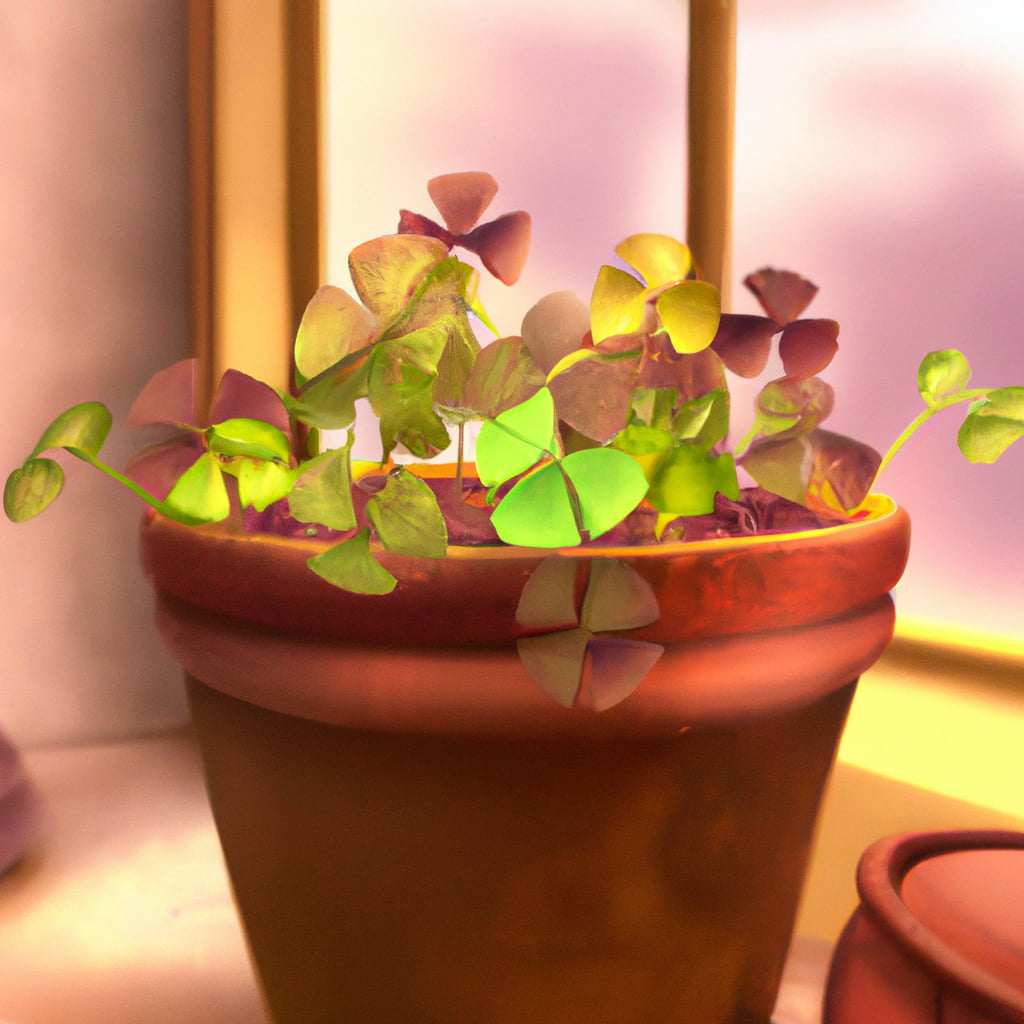
Choosing the right pot
For optimal growth, it’s crucial to select the appropriate receptacle for your oxalis bulbs. The container should give the bulb enough space to expand and a depth that allows it to settle in without being cramped.
| Container type | Dimensions | Description |
| Terracotta pot | 6 inches in diameter, 8 inches deep | Helps excess water evaporate quickly but requires frequent watering |
| Plastic container | 8 inches in diameter, 6 inches deep | Holds moisture better but requires drainage holes or else roots could drown. |
Consider factors such as drainage, size and porosity with attention to detail. Avoid using large pots which lead to excessive soil retention causing stunting of root development and possibly suffocating the plants.
Recently, I chose an oversized plastic container when planting oxalis bulbs which led to soil buildup at the bottom causing rotting stems and unsatisfactory growth. It is essential to avoid making similar mistakes by selecting the most fitting pot for your greens.
Digging through dirt may not sound fun, but with oxalis bulbs, you’ll be growing something more exciting than your typical mud pie.
Soil preparation
The optimal groundwork to prepare for cultivating oxalis bulbs is the “Amendment foundation.” Use nutrient-rich amendment soil that is well-drained and aerated for better root penetration.
Follow this simple 6-step guide to prepare your soil:
- Begin with removing any weeds and plant debris.
- Next, test the pH level of the soil, which should be neutral between 6.5 –7.0 pH.
- If pH needs adjustment, add lime for alkaline soils or sulfur for acidic soils.
- Then mix in a 2-3-inch layer of compost to the topsoil using a garden rake or shovel.
- Now turn the soil with a tiller spade to invert any remaining weeds or debris evenly with composted topsoil.
- Finally, smooth out the surface level using a garden rake before planting oxalis bulbs approximately 1-2 inches deep in the surrounding loosened soil.
One notable detail that goes into preparing your planting site’s ground is to supplement it with an ample quantity of organic materials like peat moss or manure if grown in sandy or loamy grounds.
Interestingly enough, oxalis bulb plants got their name from combining two Greek words; Oxys means sour and Halios means salt, referring to some species’ bitter taste.
Choosing the right oxalis bulbs is like finding the perfect avocado – you want them to be firm, not too big or small, and definitely not rotten.
Selecting the oxalis bulbs
Selecting the perfect bulbs for your oxalis plantation is crucial for achieving healthy, vibrant flowers. To make sure you choose the right ones, follow these six tips:
- Look for firm and plump bulbs free of any damage or mold.
- Select bulbs that are larger in size as they tend to produce better flowers.
- Check the color of the bulbs; darker-colored ones indicate higher quality.
- Make sure to select bulbs with little or no sprouting since those will have a longer shelf life and yield better results.
- Choose bulbs with dry papery skin instead of soft or slimy ones as it is an indication of healthy storage conditions.
- Lastly, ensure the supplier has a good reputation and sells fresh products.
It’s important to note that planting times can affect which bulbs to choose, as different varieties have unique growing seasons that may affect their quality.
Don’t miss out on having beautiful blooms! Take care when selecting your oxalis bulbs and take into account considerations like location, climate, soil type, moisture levels and more to achieve stunning flowers in your garden.
Choose your bulbs wisely and enjoy the rewards of a thriving garden!
Get ready to dig deep and get your hands dirty, because planting oxalis bulbs is not for the faint of heart!
Planting the oxalis bulbs
To plant the oxalis bulbs in pots, you need to know how to correctly place the bulbs in the soil, water and fertilize them, and add a layer of mulch. This section about planting the oxalis bulbs will give you insight into these sub-sections to help you successfully plant your oxalis bulbs in pots.
Placing the bulbs in the soil
When planting oxalis bulbs, one must carefully prepare the soil and properly place the bulbs in the ground. This requires a keen attention to detail to ensure successful growth of the plant.
Here is a 6-Step Guide for placing oxalis bulbs in soil:
- Choose an appropriate location for planting oxalis bulbs.
- Cultivate the soil to a depth of around 8-10 inches, removing all rocks and other debris.
- Break apart large clumps of soil and mix in organic matter like peat moss or compost.
- Plant each bulb about 2 inches deep into the loosened soil, pointy end up.
- Cover the hole with soil and gently pat down with your hand or foot to remove any air pockets
- Water thoroughly after planting and keep moist throughout the growing cycle.
It’s important to avoid overcrowding when placing oxalis bulbs in soil. They need adequate space to grow especially if you’re starting from new planting materials. If they’re planted too close together, it can result in stunted growth, limited flowering, and underdeveloped root systems.
According to Celtic folklore, oxalis was said to bring good luck when eaten on St. Patrick’s Day. Irish immigrants brought this tradition with them when they relocated to North America. Today people use these leaves as part of their springtime celebrations.
Give those bulbs a drink and some food, because they can’t survive on dry humor alone.
Watering and fertilizing the bulbs
For optimal growth, it is essential to provide adequate care to the oxalis bulbs. This includes nourishing them with water and fertilizers, sustaining their nutrients and overall structure.
Here is a step-by-step guide to help you properly water and fertilize your oxalis bulbs:
- Water your bulbs lightly but frequently, especially after planting or repotting.
- Do not let the soil dry out completely. Keep it moist but avoid over-watering, which can damage the plant’s root system.
- Fertilize the bulbs regularly during their growing season, typically in spring and summer.
- Use a balanced fertilizer with a higher amount of potassium for optimal bulb development.
- Avoid fertilizing in winter when the plant is dormant.
It is important to note that there are several factors that may influence watering frequency and fertilization needs. These factors include soil type, humidity levels, temperature fluctuations and light intensity.
Additionally, avoid letting your oxalis plants sit in standing water as this can cause root rot.
A few years back, my neighbor was growing some beautiful oxalis plants in his garden. I asked him how he managed to keep them healthy and vibrant throughout the year. He shared his techniques for watering and fertilizing — never overwatering or under-fertilizing. I followed his guidance, which resulted in lush white flowers bloom throughout the year.
Mulch: because nothing says ‘I care about my garden’ quite like a layer of dead leaves.
Adding a layer of mulch
After planting the oxalis bulbs, it’s essential to provide proper care for their growth and nourishment. One aspect of this is adding a protective layer of material over the soil. The purpose of this layer is to help regulate soil temperature, retain moisture, suppress weed growth and enhance soil fertility.
The following are the steps to take when adding a layer of mulch after planting oxalis bulbs:
- The first step in adding a layer of mulch after planting oxalis bulbs is to allow them enough time to anchor themselves firmly into the ground.
- Use organic materials like bark chips, leaves, straw and compost as they break down slowly and improve soil structure.
- To gain these benefits quickly, place mulch over a prepared area at 2-3 inches thickness around the plants but keep it away from direct contact with plant stems or crowns.
- Replenish mulch if it decomposes or breaks down effectively so that soil health comes intact throughout all seasons.
It’s worth noting that any leftover oxalis foliage should be removed before applying a new layer of mulch. The reason behind this is to prevent excess moisture retention, which can lead to root rot. Mulching helps keep your plants healthy and strong while also making them more attractive by improving their appearance.
To ensure long-term plant health and growth, here are some additional tips:
- Avoid using stones for decoration or toppings before placing mulch over your plants since they can heat up and damage delicate roots very easily.
- Add coarse sand or perlite beneath the soil can speed up drainage while retaining moisture evenly across the growing media with minimum effort put in by gardeners.
- Keep an eye out on pests like slugs or snails- who will nibble around young seedlings in cool moist conditions.
- If you live somewhere with heavy rainfall during growing seasons choose quick-draining soils supplemented with plenty of organic matter – which can increase yield in adverse climatic environments and resist pest infestations.
Proper care ensures that the oxalis bulbs have the best chance possible to grow and thrive. Adding a layer of mulch post-planting protects soil, retains moisture, and keeps weeds at bay. With enough preparation and attention, even novice gardeners can make their gardens flourish without much hassle.
If you want your oxalis bulbs to thrive, treat them like your needy ex and give them plenty of attention.
Caring for the oxalis bulbs
To care for your oxalis bulbs when planting in pots, providing the right amount of sunlight, maintaining proper watering schedules, and managing pests and diseases are crucial. In this section, we will explore the different aspects of oxalis bulb care, including its sub-sections: providing the right amount of sunlight, maintaining proper watering schedules, and managing pests and diseases.
Providing the right amount of sunlight
The oxalis bulbs require an adequate amount of sunlight to thrive. Expose the plant to partial shade or filtered sunlight for optimal growth. Direct and intense sunlight can damage the sensitive leaves. Place them in a location with bright, indirect light to avoid scorching.
It’s vital to monitor the amount of light oxalis receives daily. During winter, they typically require less light as daylight hours are shorter. In contrast, during summer, you need to ensure they receive more light as the sun is out longer than average. Adjust your plants’ surroundings by moving them into areas receiving more/less light or using shades for protection.
Oxalis bulbs are moderate growers and require proper care decisions to last long enough while producing beautiful flowers on their delicate stems. As consumers, it is crucial to remain flexible in routine check-ups on exposure tips for light conditionals that vary with climate and weather changes.
According to Gardening Know How, “The Oxalis flowers don’t last long once cut” – so it’s best enjoyed in a garden!
Water your oxalis bulbs like your ex’s phone number – don’t drown them with too much attention, but don’t leave them high and dry either.
Maintaining proper watering schedules
Proper Hydration for Your Oxalis Bulbs
Watering oxalis bulbs can pose challenges, but it’s essential to know the right ways of keeping them hydrated. Here are some tips to ensure your oxalis bulbs’ proper hydration:
- Monitor the soil moisture frequently, and only water when the topsoil becomes dry.
- Provide bright but indirect sunlight as exposure to direct sun can lead to dehydration. Maximize shading during hot afternoons.
- When watering, do not forget that proper drainage is crucial. Always allow water to drain out of the pot and into a tray.
It’s also important to consider that overwatering is just as harmful as under-watering. Be wise and water according to your plant’s needs.
Now, it would be beneficial for you to understand how often you should water your oxalis bulbs. While there is no set schedule, once every ten days would be an ideal goal.
One time, I made a mistake when I over-watered my oxalis bulbs, and they became sick and started rotting. It was a lesson learned – observation must come first before action. Why worry about pests and diseases when you can just blame the weather?
Managing pests and diseases
The maintenance of a healthy oxalis bulb begins with its disease and pest control. To detect these problems early on, monitor your bulbs regularly for signs like discolouration and wilted leaves. Remove damaged leaves as soon as possible to prevent further spread. Regular insect inspections may also help identify any potential threat before it gets out of hand.
Natural remedies can be used in managing pests and diseases instead of chemical treatments, which can harm the environment. You may brew garlic or onion with water and apply the solution to affected areas to repel pests like slugs and snails. Additionally, neem oil can be used to ward off insects that are attracted to the bulb’s flowers, while copper-based fungicides assist in preventing moisture-related fungal infections.
An essential tip for managing pests and diseases is ensuring proper soil drainage since many pathogens thrive in excessively wet soil environments. Adding gravel or grit to the pot’s base or planting the bulbs at an angle will encourage water runoff and protect against rotting roots.
Overall, practicing good hygiene by maintaining a clean growing environment will keep the bulbs resistant to pests and disease attacks. Always discard infected plant material safely away from your home garden, preventing further spread of harmful pathogens or parasites within your soil system.
Harvesting oxalis bulbs is like digging for buried treasure, except you don’t have to share with any pesky pirates.
Harvesting and storing oxalis bulbs
To harvest and store oxalis bulbs with ease, turn your attention to identifying the time to harvest, proper harvesting techniques, and storing the bulbs over winter. By following these simple steps, you can ensure a bountiful harvest and successful storage of your bulbs for future seasons.
Identifying the time to harvest
To determine the optimal time to gather oxalis bulbs, inspect the stems and foliage of the plant. For proper identification of the harvesting period, refer to the table below:
| Clues | Time to Harvest |
|---|---|
| Drooping leaves | Late summer to early fall |
| Yellowing foliage | In October |
During these periods, it is ideal to harvest oxalis bulbs as they are ripe and packed with nutrients.
In addition, it is recommended not to harvest during rainy or damp weather as excessive moisture can cause damage during storage.
To protect harvested bulbs and extend their shelf life, remove soil, braid them into bunches, and store them in a cool dry place for future use.
Harvesting oxalis bulbs is like digging for treasure, except instead of gold you get a bunch of tiny, lumpy vegetables that taste surprisingly delicious.
Proper harvesting techniques
Harvesting and preserving oxalis bulbs requires careful attention to detail. To ensure that you obtain the highest quality of oxalis bulbs, it is important to follow these steps:
- Assess the Bulbs: Before harvesting, ensure that the bulbs are matured enough to be harvested. Check for signs of decomposition such as soft or mushy spots.
- Dig up the Bulbs: Using a sharp garden fork, dig up all the bulbs without damaging them. Ensure you remove all bulb clusters or individual bulbs by gently lifting them out of the soil.
- Clean and Sort: Once removed from the soil, gently clean and dry the bulbs with a soft cloth. Then sort them according to size for ease of storage.
- Store Properly: Store oxalis bulbs in a cool, dry place like an unheated garage or basement with good air circulation until ready to plant.
It’s essential to note that oxalis produces small offspring-bulbs called bulblets grown on vertical stems before harvesting. These should be left in situ in the soil as they will grow into new plants next season if left untouched.
Folklore has it that Dutch merchants back in 1597 carried this ‘Lucky’ bulb around as a talisman, believing it could steer them safe during their travels at sea since they stayed healthy during long journeys without disease claims due to their high levels of Vitamin C when eaten raw on vessels!
Say goodbye to summer and hello to oxalis bulbs in hibernation, because apparently even plants need a break from the cold.
Storing the bulbs over winter
After harvesting the oxalis bulbs, it is important to store them properly over winter to ensure their survival and growth during the next planting season. Here’s how to do it:
- Wash the bulbs thoroughly in cool water to remove any soil and debris.
- Allow the bulbs to dry completely before storing them in a cool, dry place for the winter.
- Place the bulbs in a paper bag or cardboard box that has been filled with vermiculite or peat moss.
- Store the bags or boxes in a dark, cool place that maintains a temperature between 35 and 45 degrees Fahrenheit.
- Check on the bulbs periodically throughout the winter months, discarding any that show signs of rot or damage.
Remember not to store oxalis bulbs together with fruits or vegetables since these release ethylene gas that encourages ripening and can damage your stored oxalis bulbs.
To guarantee optimal performance when planting again out of these stored oxalis bulbs next season, bury a few cloves of garlic at least six inches deep around where you plan on planting. The sulfuric properties of garlic will supplement and fortify nutrients found natural in your garden soil to you maximize results.
There was once an avid gardener who harvested oxalis bulbs from her carefully tended flower beds. Excited about their yield, she packed them away into plastic containers with her other gardening tools only for them all to be covered in fuzzy mold when she uncovered them come springtime. Needless to say, she learned first-hand about proper storage procedures for her beloved plant species.
Your oxalis plant may be beautiful, but don’t forget to thank it for sacrificing its bulbs for your culinary creations.
Conclusion: Enjoying your beautiful oxalis plant.
To fully appreciate the beauty of your oxalis plant, ensure you give it proper care and attention. Remember to water it consistently and ensure it gets adequate sunlight. Don’t be afraid to prune when necessary and feed it with an appropriate fertilizer. By following these simple guidelines, you can enjoy a long-lasting beautiful oxalis plant that will add vibrancy to any space.
In addition to the above tips, consider rotating the pot regularly to allow for even growth. Monitor the weather conditions, particularly during winter when there is less sunlight, as this may affect your plant’s health. Keep your pot in well-draining soil as oxalis bulbs are prone to rotting in overly moist conditions.
When growing oxalis bulbs in pots, they might need repotting every two years or so depending on their size. Use this opportunity to refresh the soil mix as well. By doing this, you’re giving them much-needed space for their roots to grow and access more nutrients.
Don’t miss out on the beauty of nature by neglecting proper plant care. Investing in simple but essential gardening practices can make a significant difference in your overall decor style while having a positive impact on your mental well-being too!
Frequently Asked Questions
Q: When is the best time to plant oxalis bulbs in pots?
A: The best time to plant oxalis bulbs in pots is in early spring or fall.
Q: What type of potting soil is best for planting oxalis bulbs?
A: A well-draining potting soil mix with added perlite or sand is best for planting oxalis bulbs in pots.
Q: How deep should I plant the oxalis bulbs in pots?
A: Plant the oxalis bulbs in pots at a depth of approximately 1 inch (2.5 cm).
Q: How often should I water oxalis bulbs in pots?
A: Oxalis bulbs should be watered thoroughly when the top inch of soil in the pot is dry.
Q: Do oxalis bulbs in pots need fertilization?
A: Oxalis bulbs in pots benefit from regular fertilization with a balanced, water-soluble fertilizer every 4-6 weeks during the growing season.
Q: How should I care for oxalis bulbs in pots during winter?
A: If you live in a cold climate, bring the potted oxalis indoors before the first frost and place it in a cool (40-50°F/5-10°C), dark location where it can rest for a few months. Resume watering and fertilizing when new growth appears in spring.

A passionate gardener and founder of ForTheLoveOfGardeners.com. She shares her expertise to help you cultivate thriving gardens and find joy in the beauty of nature.